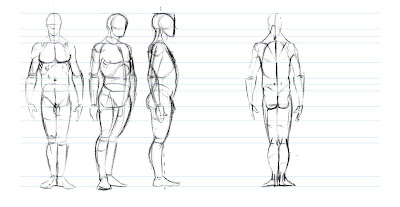
Just as the Cube Rotation Assignment was designed to get you to see volumes turn in space, a TurnAround is designed to show proportions of a character or object as they rotate in space. This helps you to draw the character consistently and proportionally "on model" in many views. Below are some lecture notes in the hopes that this process will be easier and make the creating a turnaround more fun. As always, begin you character with a gesture. I started with the world's most basic pose in an effort to simplify the information. When turning a character of your own, you really should pose the character in such a way that best describes the personality. I'll post some examples of good turns at the bottom of this...I'll probably get in trouble for doing so, but this is a "lonely" blog right?
Again, start with your "G".
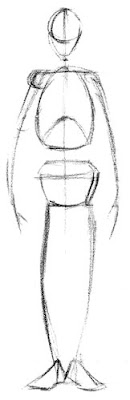
Then move on and flesh out the figure using "C" and "A". I left off the "T" to keep this quick. Your character should be turned in both a construction phase to show how you draw the character using construction and in a finished phase to show what the character's costume and other details look like.
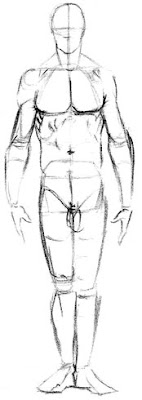
Once you have laid in a complete GCAT drawing in one view, draw out lines the touch key points such as construction shapes, details such as eyes, navels, and other stuff. You will draw to these lines and not past them. Remember these are your character's proportions, drawing shapes etc past these lines will throw off the proportions of the character.
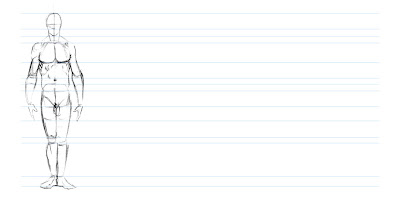
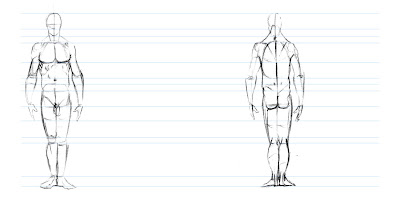
The next step would be to draw in the last pose of the turnaround. This pose is actually a key pose. Key poses describe the start and end of action in animation and as this is a five-point turn; the last drawing will be a view from the rear or a view 180 degrees from the front view. Notice how the components of this drawing line up to the lines created from the front view. Yes I did start this with a gesture but because it's such a straight pose, I left out that step.
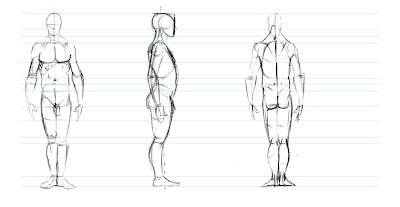
Go on the the next drawing, this pose in the turn should be the breakdown. This pose is drawn after the keys are complete and describe the action between pose to pose. In this case, this particular pose breaks down a 180 degree turn and thus, shows a 90 turn or the side view of the character as it turns from left to right.
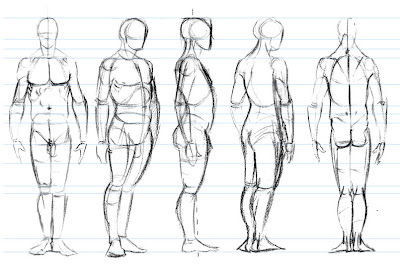
Because drawing a turnaround between stringent lines will make your stiffen up, be sure you remember the implied gesture of a pose. Do not let yourself leave out the gesture of any step in the process, or else you get this visual vulgarity. I joke about this but I see it all of the time.
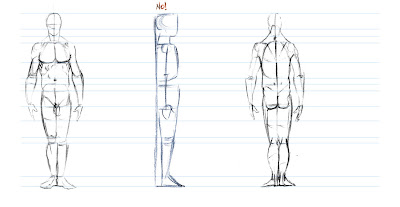
To prevent the above yuck, remember the implied gesture of your character. The spine of a figure is a natural "S" curve, very easy to see from the side. The neck gently curves back while the thoracic vertebrae sweep carry the ribcage forward. The lumbaric vertebrae change direction and the sweep of the spine ends through the sacrum. The legs have their own natural arcs to counter the curvature of the spine. Keep this in mind to keep your drawings alive.
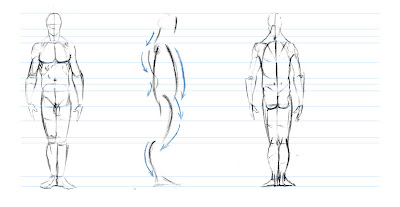
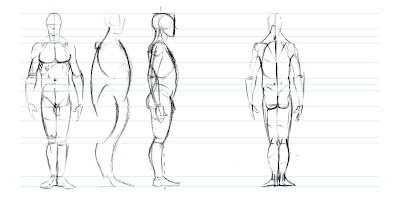
Flesh out this gesture to get a good profile view as shown below. notice also how the arm gently curves back to offset the weight of the trunk.
Now it's time to focus on the inbetweens. These are poses between the key and breakdown. In this case it's a 3/4 view of the front. Again get a good gesture first...
...And then flesh it out.
Almost done now-you can see where we are heading by now. By applying the steps mentioned you can draw in your 3/4 rear to complete this turn. Note that the amount of perspective incorporated into this is minimal. Assume you are looking through a 75mm to 100mm lens and the horizon line to which everything recedes passes through the center of the figure at about pelvis height. Don't overdo the perspective of you figure our it may blow out the proportions.
What about a character, rather than a relatively stiff figure drawing
group like the above (this too needs some updating), how do you draw up a turnaround of
a non-realistic character? The same method applies to anything that
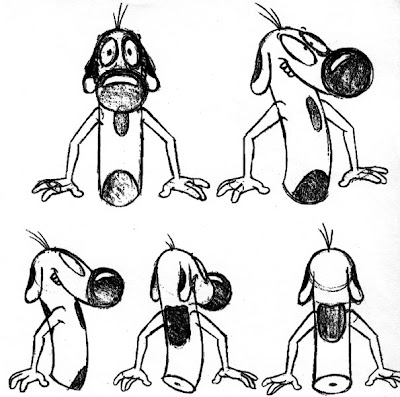
you plan to turnaround. Take this character for example, Shim, a little
fellow I drew up for in class assignments
This character is a simple bean with gesture at it core.
And constructed with simple shapes including mitten hands and wedge feet.
Now that we have some hard masses we can plot out the rest of the body positions for the turn. This will be an 8 point turn or one that rotates the character in 360 degrees, some times all that is needed in a turnaround is five poses; Front, 3/4 front, side or profile, 3/4 rear, and rear referred to as a five point turn. The eight point turn is just a little more thorough from a motion stand point. The back gesture is shown next because it would be a key if animated. I would suggest NOT inbetweening your way through a turnaround, stuff can get out of proportion if you do so.
Here is an in progress of roughing out the gestures of most of the poses in the turn, this helps to see how the figure will appear to turn and to see where the poses will end up on the page or screen, and also acts to keep the drawings loose and hopefully prevents them from stiffening up.
Lay in your construction over the gestures, be sure to line up the corners of the hard masses with the ruled lines as shown above, doing so will make things easy and keep the proportions correct.
After a little time you will get a roughed in version of your character. At this stage the character will be cleaned up but I left it ruff as is to better get across the rotation of the construction shapes and how they conform to the gesture(s) of the poses. More to come from here, stay tuned and have fun drawing!
Here are some notes from a previous turnaround lecture...
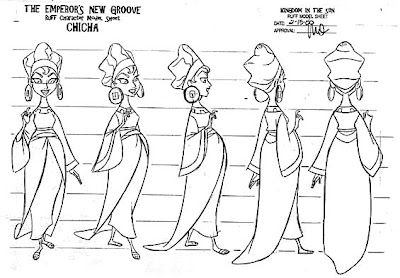
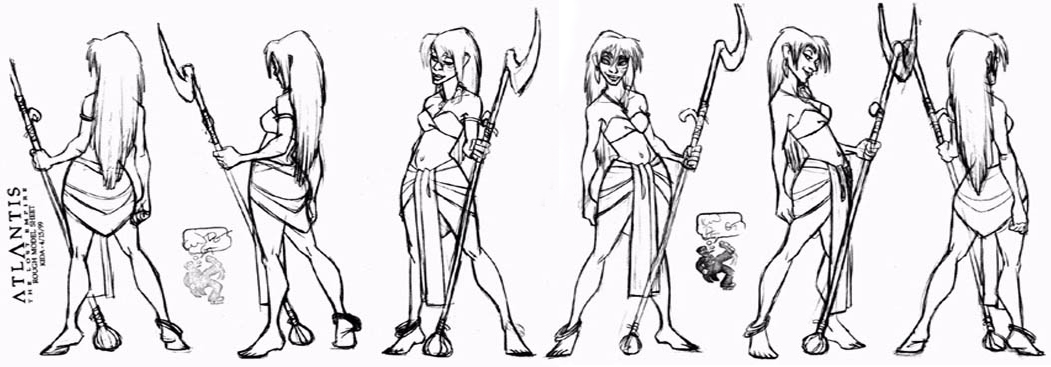
Below are some good examples for your perusal. Enjoy! I hope this helps with your turnarounds.


 This one's titled "Souvenirs"


